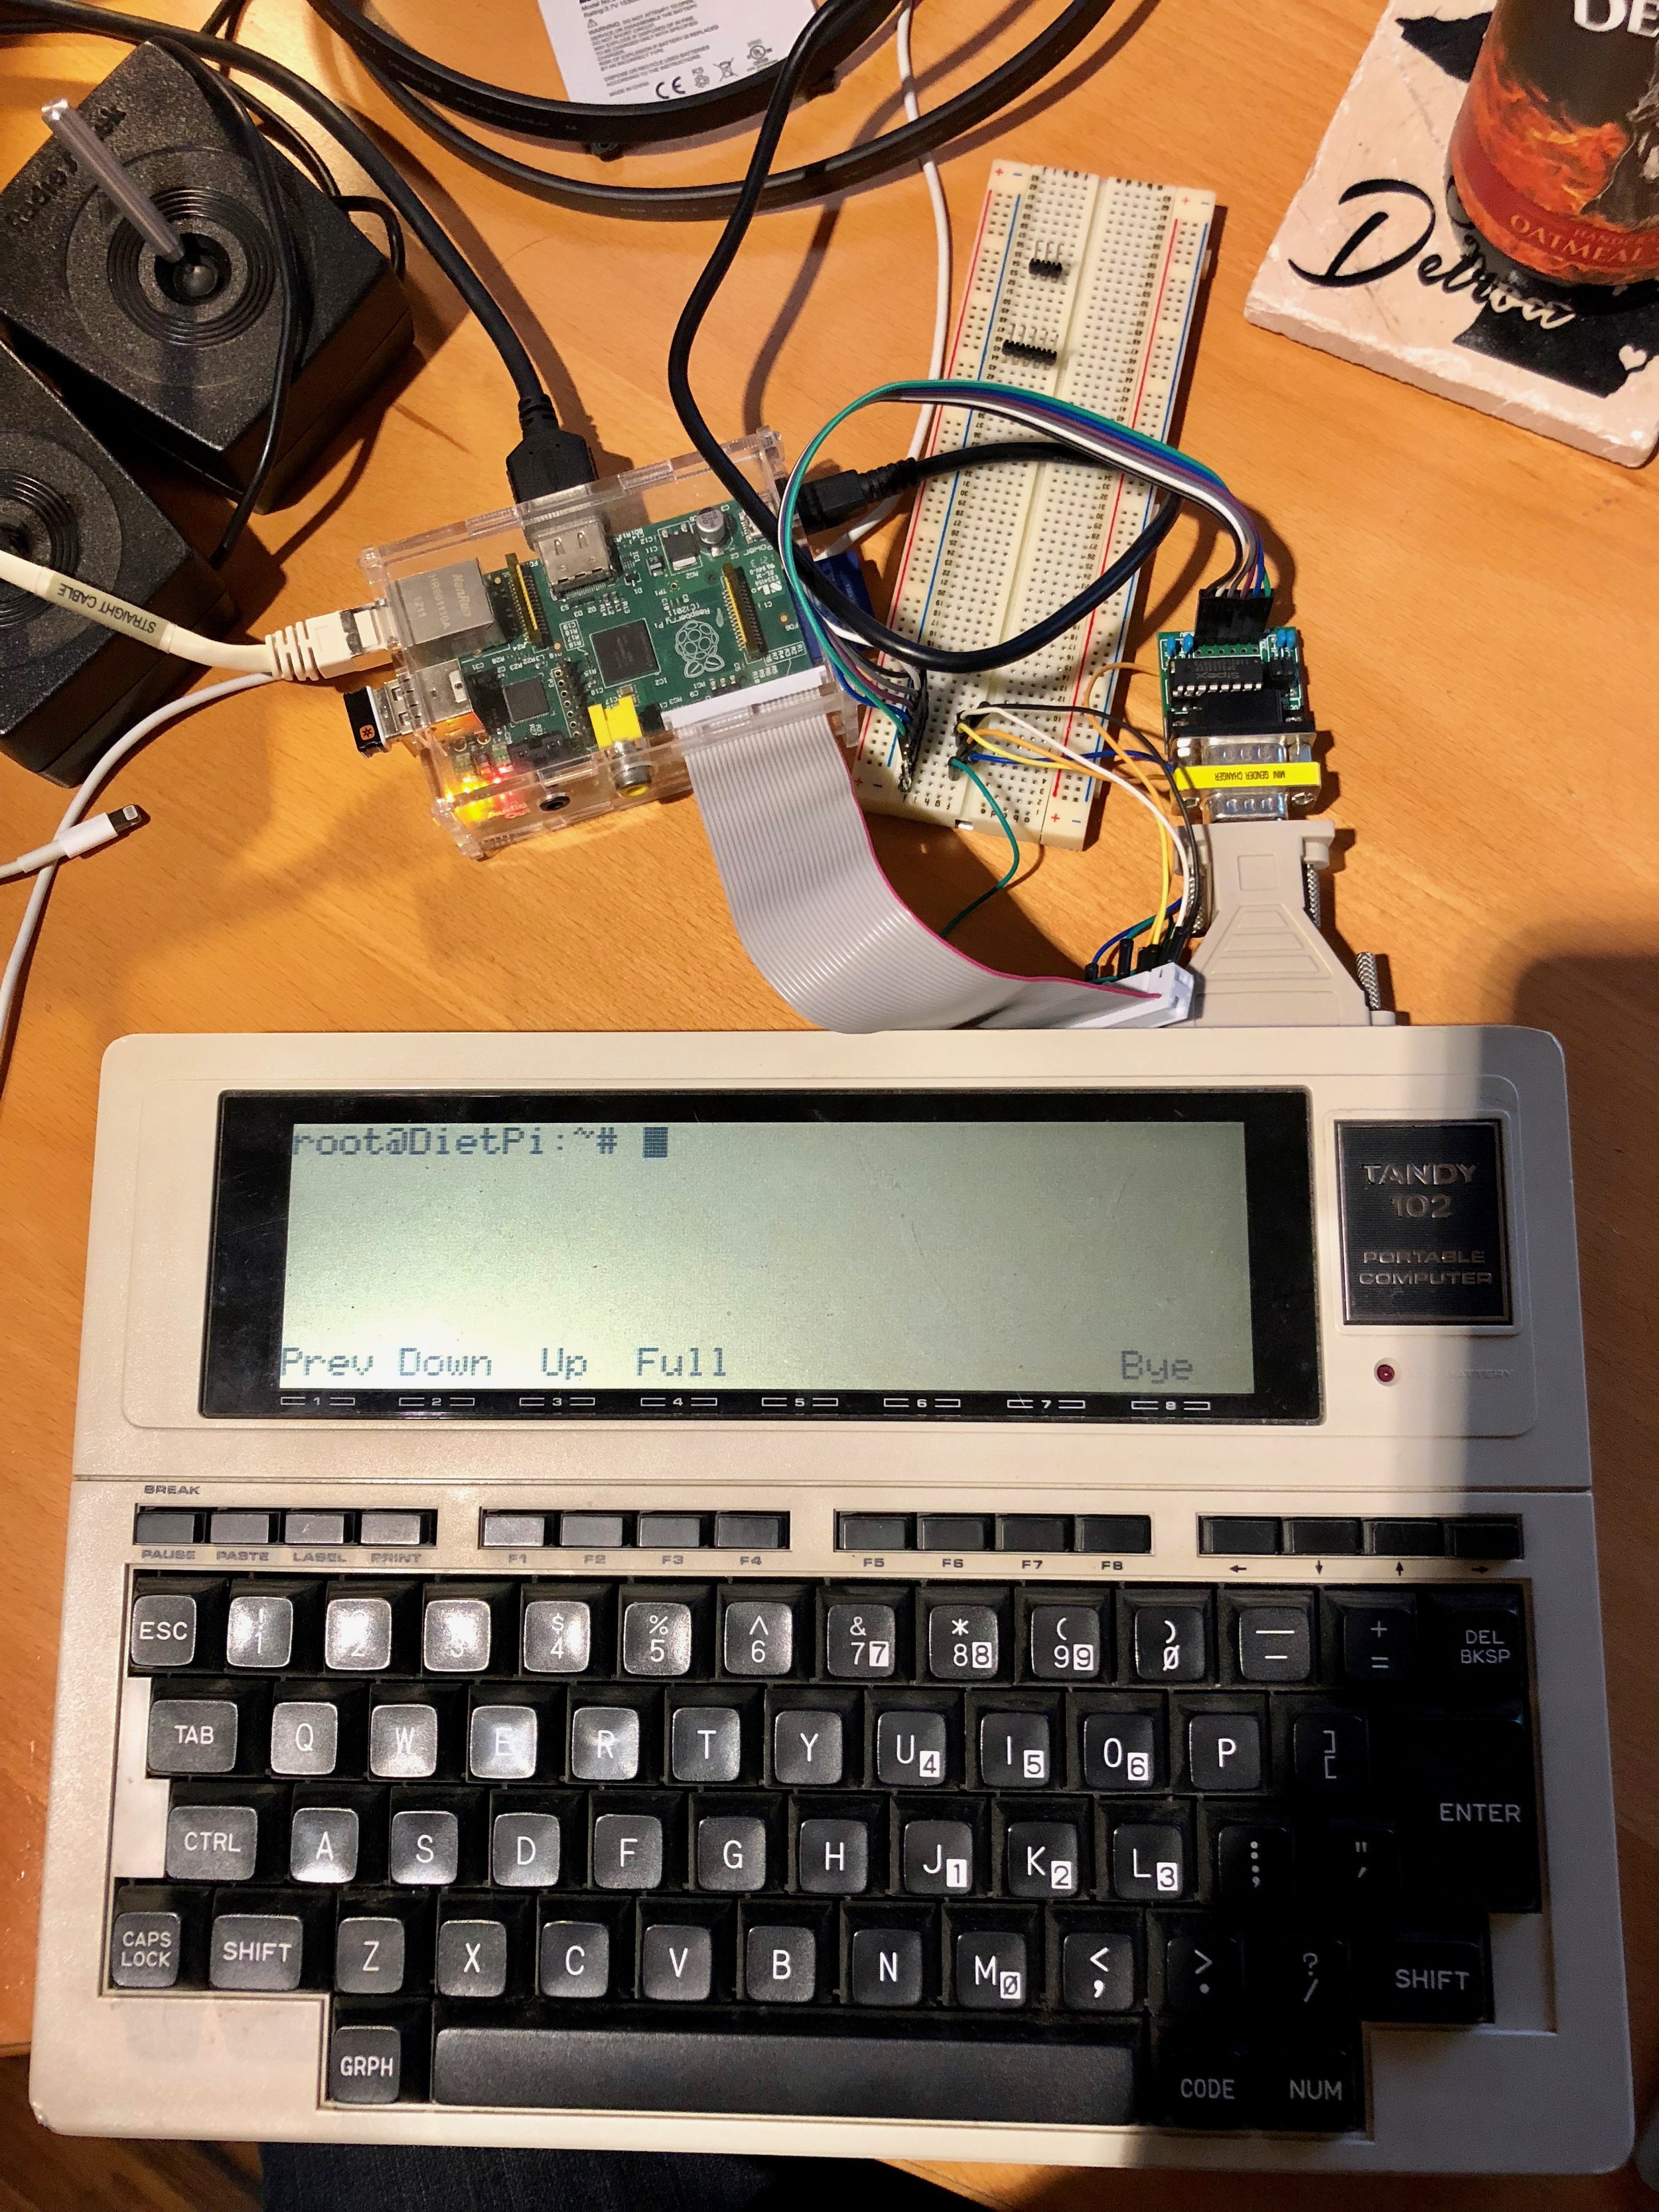
Model 102 Serial Terminal

Six years ago when I started this blog I was eagerly awaiting the release of the Raspberry Pi as well as the birth of my daughter. In fact they both arrived around the same time so I didn't have as much time to experiment with it as I would've liked. One of the things I never got around to doing was getting a serial console connection between my Pi and my Tandy Model 102. I ordered cheap little MAX232 kit and soldered it together but ran into some kind of trouble at the time. I don't remember what the issue was, and I don't think I even spent any time troubleshooting it, it just fell on the backburner until I finally dug it out again today.

In the intervening years this project has been done by plenty of others so I'm not going to bother detailing the steps, but I'm happy to have gotten it done nevertheless. I was really just looking for something to mess with while I wait for April so I can start on my RC2018/04 RetroChallenge entry. Watch for an upcoming blog post about my RetroChallenge project where I will detail exactly how much more I have bitten off more than I can chew. In the mean time, now that I have a working proof of concept here, my next step is to get it set up on my Raspberry Pi Zero W and put it into some type of compact case so I can have a convenient little box that runs TCPser to get some of my retro computers onto the internet.

IMG_0220.jpg

New Raspbian Image

I finally got around to setting up the new Raspbian image tonight. So far I'm really impressed with how well things have progressed since the debian image I had been using. There is a nice config tool to help with a lot of the initial setup stuff, although I did have to do some config.txt modifications in order to get any video at all on boot.  It even has an option to resize the partition on next boot to fill your SD card.  It's still not what I would call "fast" for things like web browsing but for the short time I've been using it, it is noticeably better than the old debian image I had.  If you're not sure about upgrading, I'd say it's definitely worth the effort.  Of course one of the great things about the Raspberry Pi is that you can just pop in a different SD card so swapping the OS is a very minor compared to other PCs. I also put it in it's shiny new adafruit pi box which is very cool.  It's a very clever design and looks cool with the board exposed and the LEDs doing their thing inside.


Robocalypse

I've vaguely known about Arduino for a long time now but, to me, it's been almost just background noise on the internet.  I've just never really given it any attention until recently.  People invariably compare the Raspberry Pi to the Arduino and there is lots of talk about using the GPIO header for many Arduino-like tasks.  Eventually the constant Arduino noise penetrated my thick skull and I started to look into it and all I can say is it's amazing.  Things have progressed so far since I dropped out from studied electrical engineering at Michigan Tech.  I've forgotten most of what little I managed to learn in my first pass at college, but it hardly matters.  Arduino makes it easy and all the heavy lifting has already been done by people that actually got up and went to their classes. Even as recently as ten years ago I had a friend (okay not that recent but time flies when you get old) that claimed he wanted to build a robot and, at the time, it seemed pretty unlikely to me that he could pull it off (no offense Russ) but now it's crazy easy and cheap.  There is even a contest underway to build a robot for under $10.

Anyway, the point is, this Raspberry Pi of mine is likely to combine with an Arduino and I do my part to bring on the inevitable robocalypse.

Raspberry PI HDMI to VGA adapter

Update:  It seems that the cable mentioned in this post may be unsafe for your Raspberry Pi.  Use at your own risk! I've been using a cheap HDMI to DVI cable from monoprice to connect my raspi to my old Samsung monitor that usually is the second display for my iMac.  This worked fine except I had to give up my dual screen goodness that I had really come to enjoy.  The Samsung monitor also has a VGA input and it is easy to switch between two computers if one is hooked to each.  Originally it didn't seem feasible to connect the raspi using the VGA input because converting HDMI to requires more than just a simple cable.  The raspi doesn't output analog in its HDMI port so you need some sort of "active" conversion box to translate the digital HDMI to analog VGA and the general consensus on the raspberrypi.org forums was that this would probably not be cheap.  However there were some reports that a company called "Neewer" made a cheap cable that did the trick.  Apparently it has some sort of chip hidden in the dongle that does the conversion.  I ordered one from Amazon for about $15 and am happy to report that it works great.   The only thing I needed to do was modify my config.txt to set the resolution of my monitor.

config_hdmi_boost=4
disable_overscan=1
hdmi_drive=2
hdmi_group=2
hdmi_mode=58

The first two lines I had configured previously to get the HDMI-DVI cable working.  The next two lines I just copied from the wiki page about HDMI to VGA converters.  They may not have been necessary but I haven't tried it without them.  The last line is the one that sets the resolution.  You can look up the hdmi mode value from the wiki.


Raspberry Pi Lego Case

I managed to make a crude lego case for my raspi.  I had originally intended to design something with the Lego Digital Designer but I haven't really had time since the birth of my daughter coincided with the delivery of my raspi.  Some projects take precedence over others.  However I did find time to stop by the Lego Store near my house when I was running some errands and just bought a semi-random assortment of bricks from the in-store Pick-a-Brick wall.  It's probably a good thing that I didn't have an actual design because the in-store selection was pretty limited and I think I would've been disappointed.  As it is, I have a functional case for now, even if it is less than ideal.  It's not really worth posting the plans for in its current state but if/when I make something better I'll see what I can do.

Raspberry Pi US Keyboard Config

It seems the Debian Squeeze image for the Raspi uses a British keyboard layout by default.  Not surprising and easily fixed by editing /etc/default/keyboard and changing the line XKBLAYOUT=”gb” to XKBLAYOUT=”us".  While you're at it you might as well run "sudo dpkg-reconfigure tzdata" to fix your time zone too. I've also found other some weirdness here and there.  There are two entries in /etc/passwd for the user "pi" but only one in /etc/shadow.  I've disabled the user for now but I really should delete it.  There is also a sudoer entry for "suse" which doesn't even exist in /etc/passwd.  Probably someone copied sudoers over from a suse box?  But why would anyone do that?  It's odd but that's what jumping on early is all about.  Lots to fix and lots to learn.

Raspberry Pi Debian Squeeze Default Editor

It occurred to me this afternoon that I could just enable internet connection sharing on my iMac and then use its ethernet connection for the raspi.  I'm still going to get the wifi dongle working but this is actually a better solution for now.  That way I can more easily swap out different SD cards for different distros and not have to immediately mess with the wifi setup each time. So the first thing I did was to create myself a user account.  The second thing I did was to make myself a sudoer.  I launch visudo and wtf... I'm thrown into some sort of crazy editor that makes no sense.  Maybe nano or something, who knows?  There is a reason I learned vi:  it's like Visa, it's everywhere you want to be.  The only editor you can guarantee is going to be on any unix box you encounter is vi (or some vi clone like vim if you must be pedantic) so why waste time learning something else?  So anyway, I poked around looking for a .bashrc or .profile entry setting EDITOR to something moronic with no luck.  Eventually my buddy Google told me that visudo on debian is compiled to use /usr/bin/editor which is linked to [some stupid editor].  To fix it simply "rm /usr/bin/editor" and then "ln -s /usr/bin/vi /usr/bin/editor" and bob's your uncle.


Raspberry Pi First Boot

I finally got a little time to unbox and connect my Raspberry Pi that had been sitting in the package for several days.  It arrived the same day as my daughter so, needless to say, she took precedence.  She "helped" daddy get it set up which meant I really didn't get any further than getting the flash card setup and the keyboard an monitor working.  The keyboard I chose months ago before I had even placed an order was a Logitech k400 Wireless Touch Keyboard.  It uses a tiny wireless USB transmitter and combines a keyboard and trackpad in a fairly small package.  It worked immediately with no configuration necessary.  I'm pretty happy with it and it's perfect for the Raspi. I put the Debian Squeeze on my MicroCenter Class 10 SD card.  In spite of many dire warnings about Class 10 cards in the raspi forums, it worked just fine.

My monitor required a little bit more effort.  The monitor is an older Samsung SyncMaster 225sw using an HMDI USB to DVI cable from monoprice.com.  When if first booted up I would see the display flash on the screen for a second and then go blank for 3 or 4 more seconds.  This kept repeating with the display blinking on and off.  After a little research I found that I had to create a config.txt in the boot partition on my flash card and add the single line "config_hdmi_boost=4" to get it working.

That's just as far as my daughter was willing to let me go before she demanded to be the center of attention once again.  Next, up I need to see if I can get my wifi adapter going and then I can really start seeing what I can do with this little guy.